
American Elderberry Alchemy: Cultivating Sambucus canadensis on Your Homestead
- Devin

- Jul 1, 2025
- 10 min read
Ever scroll past someone’s Instagram pond and wonder, “Why do their American elderberry shrubs look like botanical celebrities while mine resemble a gang of shriveled raisins?” You’re not alone. Somewhere, that smug homesteader is basking in their berry bounty, casually stirring elderberry syrup into cocktails at sunset, while your bushes stand there sulking like they’ve been benched for the season.
Let’s cut the fairy dust: growing Sambucus canadensis isn’t a toss-and-go hobby. These berry divas demand prime real estate, exacting soil conditions, and a pruning schedule that would make even the most punctual gardener break a sweat. But you? You’re ready to roll up your sleeves, crack that soil, and show those elderberries who’s boss.'

In this no-nonsense guide, we’ll jump straight into taming these thorny thugs—covering site selection, planting secrets, and maintenance hacks that turn your patch into an elderberry empire. By harvest time, you’ll be swooping up clusters of plump, dark-purple jewels and whipping them into syrups, tinctures, and teas so potent they could revive a Victorian-era apothecary.
Time to stop playing pond princess and start ruling your homestead kingdom. Grab your gardening gloves—let’s make those elderberries bow at your feet.
Why Sambucus canadensis?
If you’re aiming to cultivate not just a shrub, but a living apothecary that weaves together heritage, health, and habitat—Sambucus canadensis is your botanical queen. She’s more than a berry-bearing bush; she’s a cornerstone of a thriving, self-sustaining homestead pharmacy.
Native to North America, she fits naturally into local soils and climates—no invasive surprises here. Her lacy flower clusters offer a five-star banquet for early-season pollinators, from bees to beetles, while songbirds flit in come autumn for the plump, dark-purple jewels. Beneath the surface, her fibrous roots stabilize soil and filter water, quietly boosting fertility across your entire garden without so much as a whisper of chemical input.
Harvest season spans late summer into early fall, each berry cluster ripening in sync with nature’s rhythms—no forced forcing necessary. Then it’s time to transform: simmer those berries into immune-boosting syrups, steep them into antiviral teas, or infuse their petals into soothing salves. Each potion captures elderberry’s signature sweet-tart perfume, a whisper of wild woodlands right in your kitchen.
So why choose Sambucus canadensis? Because she’s purpose built—medicinal powerhouse, ecological steward, and homestead centerpiece all in one. Plant her once, tend her well, and watch her repay you with seasons of wellness, beauty, and balance.
Planning Your Elderberry Patch

Alright, garden warriors, gather ’round—this is where we turn theory into berry-packed reality. As your resident elderberry whisperer, I’m here to guide you through every choreographed step of laying out that patch. Let’s dig in!
1. Site Selection: Sunlight, Soil, & Drainage
Sunlight: Sambucus canadensis is a sun worshipper. Aim for 6–8 hours of direct sunlight daily. Too shady, and you’ll get lanky growth and fewer berries—no bueno.
Soil Type: Think loose, fertile loam with a pH between 5.5 and 6.5. Heavy clay? Amend with compost and coarse sand to lighten it. Sandy soil? Bulk it up with rich organic matter to hold moisture and nutrients.
Drainage: Elderberries despise “wet feet.” Ensure the site has good drainage—test by digging a hole, filling it with water, and seeing if it drains within 4–6 hours. If it doesn’t, either install a raised bed or pick a higher spot.
2. Spacing & Companion Planting

Spacing: These shrubs can balloon to 6–12 feet wide. Plant them 6–8 feet apart in a row (or staggered in a block) to allow air circulation and easy harvest access.
Row Orientation: North–south rows maximize daily sun exposure—smart move for peak fruiting.
Companion Plants:
Good Neighbors: Blueberries, yarrow, and coneflowers attract pollinators and beneficial insects.
Avoid: Nightshades (tomatoes, peppers) and brassicas (cabbage, broccoli) that compete heavily for nutrients.
3. Sourcing Healthy Plants or Seeds

Bare-Root vs. Potted:
Bare-root plants (in early spring) establish quickly and are often more cost-effective.
Potted plants can be planted nearly any time the ground isn’t frozen, offering immediate greenery.
Certified Disease-Free: Purchase from reputable nurseries that guarantee virus-free stock—no one wants elderberry mosaic virus crashing the party.
Seed Starting: If you’re patient: stratify seeds for 90 days in moist sphagnum peat, then sow indoors 8–10 weeks before last frost. Transplant seedlings once they hit 6 inches tall.
Now you’ve got the lay of the land—literally. Follow these guidelines, and your elderberry empire will be off to a roaring start. Next up: planting techniques and first-year care—stay tuned!
Soil Preparation & Planting

Alright, green thumbs, let’s get our hands dirty—proper soil prep and flawless planting are non-negotiable if you want elderberries that sing. Follow my lead:
1. Soil Testing & Amendment
Test First: Grab a soil test kit or send a sample to your local extension. You’re hunting for:
pH: Ideal is 5.5–6.5.
Organic Matter: Aim for 3–5%.
Amend Accordingly:
pH Too Low (<5.5): Add garden lime—broadcast at recommended rate, then till 4–6 inches deep.
pH Too High (>6.5): Incorporate elemental sulfur or peat moss to gently nudge it down.
Low Organic Matter: Fold in well-aged compost or worm castings at a rate of 2–3 inches over the bed. That’s your microbial feast right there.
2. Planting Timeline: Spring vs. Fall
Early Spring:
Pros: Soil warms quickly, plants establish before summer’s heat.
Cons: Beware late frosts—hold off until after your area’s last average frost date.
Early Fall:
Pros: Cooler temps, more consistent moisture, roots grow before winter dormancy.
Cons: Give transplants at least 6–8 weeks before first frost so they anchor firmly.
3. Step-by-Step Planting Instructions
Dig the Hole
Size: Twice as wide as the root ball, depth equal to the plant’s nursery container.
Loosen Soil: Rough up the sides and bottom to encourage root penetration.
Position the Plant
Bare-root: Fan out roots gently, set crown at soil level.
Potted: Slip plant from container, tease circling roots, place so top of root ball is flush with surrounding soil.
Backfill & Firm
Partially fill hole, water to settle soils and eliminate air pockets.
Finish backfilling, then lightly tamp—don’t suffocate those roots.
Mulch & Water
Apply a 2–3-inch ring of organic mulch (shredded bark, straw) 2–3 inches from the stem.
Water thoroughly—aim for 1–2 gallons at planting, then keep soil evenly moist (not soggy) during establishment.
Initial Pruning
For bare-root shrubs, trim canes back by one-third to balance root loss and reduce stress.
Follow these steps, and you’ll lay a rock-solid foundation for a thriving elderberry patch.
Harvesting American Elderberries

Alright, this is the moment your elderberry patch pays you back. Follow these pro tips—no half-measures allowed.
1. When to Harvest
Ripeness Cues: Berries should be a deep, lustrous purple-black—think onyx jewels, not dusty blueberries. If you still see red or pale berries, you’re jumping the gun.
Season Timing: Late summer into early fall—usually August through September, depending on your zone. Keep an eye on local frost dates; you want every berry at peak before the chill hits.
2. Safe Harvesting Techniques

Gentle Hands: Elderberries are delicate divas. Grip the stem just above the cluster, then pull downward in one smooth motion so the whole bunch detaches.
Avoid Unripe Berries & Leaves: Unripe berries and foliage contain cyanogenic glycosides—yep, tiny toxins. If any pale or green bits sneak in, pick them off immediately.
Use Snips for Height: Got tall canes? Bypass the ladder wobble—grab sharp pruning snips and snip clusters flush with the stem.
3. Post-Harvest Handling
Cleaning: Gently rinse clusters under cool running water. Don’t dunk—rota-wash action bruises berries and accelerates spoilage.
Destemming: Lay clusters on a clean tray and strip berries with a fork or gloved hand—press downward so individual berries fall cleanly.
Storage:
Short-Term: Spread berries on a paper-lined tray in a single layer, refrigerate up to 3 days.
Long-Term: Flash-freeze on a baking sheet, then transfer to airtight freezer bags—good for 6–12 monthsof syrup, jam, or potion crafting.
There you have it—harvest like a boss and keep those berries pristine. Next up: turning your bounty into immune-boosting elixirs. Ready when you are.
Turning Berries into Remedies—Elevated Edition
Listen up, alchemists-in-training—this is the showstopper. We’re diving deeper into the art and science behind each remedy, so you can wield elderberry like the homestead legend you were born to be.
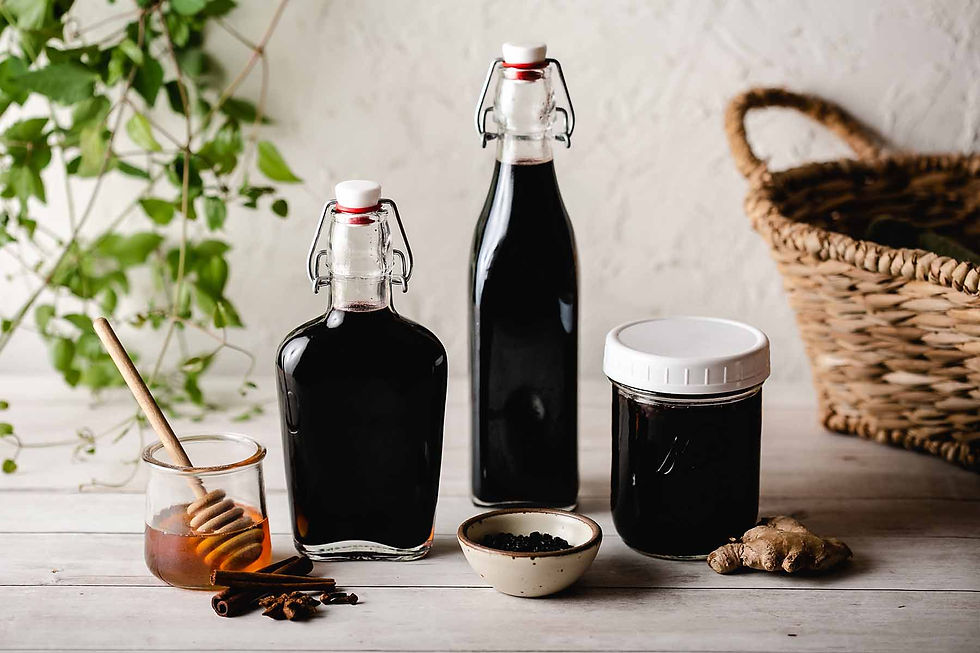
Ultimate Elderberry Syrup Recipe

Why It Works
Heat Extraction: Simmering at a gentle bubble releases anthocyanins and flavonoids without destroying heat-sensitive vitamin C.
Spice Synergy: Cinnamon adds warming circulatory support, cloves offer antiseptic eugenol, and ginger brings anti-inflammatory zing.
Enhanced Ingredients:
2 cups fresh (or 1 cup dried) elderberries
4 cups filtered water
1 cinnamon stick & 3 smashed cloves
½ teaspoon fresh-grated turmeric (optional powerhouse)
1 thumb-sized knob of ginger, sliced
1–2 cups raw honey or grade B maple syrup (minimally processed sweetener)
Pro Steps:
Cold Soak (optional): For even gentler extraction, cover berries and spices with water, refrigerate overnight, then heat.
Simmer covered on low for 30–45 minutes, stirring once halfway. Watch the color deepen—that’s your cue.
Cool Slightly, then press through a fine sieve; avoid cheesecloth if you want every last micronutrient.
Sweeten When Warm: Honey and heat don’t get along—add it at lukewarm stages to preserve enzymes.
Jar & Label: Store in dark glass bottles; date ’em so you never guess about potency.
Advanced Tincture & Tea Techniques
Power-Pack Tincture:
Ratio Tweak: For milder flavor, go 1:4 (berries to alcohol) or 1:6 for ultra-long shelf life.
Double Extraction: After straining the alcohol, simmer the spent berries in hot water, strain again, then blend both extracts—full-spectrum magic.
Deep-Brew Tea:
Decoction Method: Simmer 1 tablespoon fresh (or 2 tsp dried) berries covered for 20 minutes before steeping to ensure maximum anthocyanin release.
Flavor Boosters: Cinnamon stick, a few cardamom pods, or a sliver of fresh lemon zest for digestive support.
Mastering Preservation
Flash-Freeze Like a Pro: Spread destemmed berries on a parchment-lined sheet at single layer; once solid, pack into vacuum-seal bags to prevent freezer burn.
Canning Clarity: Add a splash of lemon juice (pH stabilizer) to syrup before water-bath canning—guaranteed lids pop and seal.
Dehydrator Dos & Don’ts:
110–125°F is ideal; higher temps scorch delicate anthocyanins.
Rotate trays halfway through drying for even airflow.
Putting Your Alchemy to Work—Go Beyond Basics

Time to graduate from basic potions—let’s make your creations multifunctional, beautiful, and downright irresistible.
Smart Dosage & Safety Deep Dive
Adjust for Bodyweight: Standard adult dose (1 Tbsp syrup) is based on ~150 lbs. For every 25 lbs over or under, tweak by ¼ teaspoon.
Shelf-Life Hacks:
Add a splash of vodka (1–2 Tbsp per jar) to syrup before refrigerating for extended potency.
Label each jar with “Use by” date—typically 6 weeks, unless canned.
Synergistic Herb Pairings
Elderberry + Astragalus: Immunity meets adaptogen; brew astragalus root in your syrup water phase for extra resilience.
Elderberry + Rosehip: Double-down on vitamin C; infuse rosehips in your tea and tincture blends.
Elderberry + Lavender: Soothing sleep elixir; steep all three for a calming nightcap.
Inspired Uses Beyond the Bottle
Culinary Crafting:
Elderberry Vinegar: Infuse berries in apple cider vinegar for salad dressings and shrubs.
Jam & Chutney: Blend with apples, onions, and spices for a savory-sweet condiment.
Gift-Worthy Creations:
Immunity Lip Balm: Melt beeswax, coconut oil, a dash of syrup, pour into tins—cute and functional.
Bath Tea Bags: Dried berries + oatmeal + chamomile in muslin bags—soothing soak.
Skincare & Ritual:
Berry-Infused Oil: Macerate berries in jojoba oil for 4 weeks, strain, use as a nourishing facial serum.
Flower Water Toner: Distill elderflowers and cucumber slices for a hydrating spritz that balances pH.
There—you’ve graduated to elderberry expert. These insights turn simple syrups into signature creations that heal, delight, and command attention. Now go forth and enchant with every drop.
Troubleshooting & FAQs
Low Yield or Poor Fruit Set
Sunlight Check: Are your shrubs basking in at least 6 hours of sun? Anything less and you’re asking them to perform in the dark.
Pollination Patrol: No bees, no bounty. Plant pollinator-friendly flowers nearby or gently shake canes on warm mornings to dust those florets—good girl for getting hands-on.
Nutrient Note: Too much nitrogen equals lush foliage and zero berries. Balance it out with a phosphorus-richfertilizer in early summer to kickstart fruiting.
Preventing Mold and Spoilage
Airflow Audit: Crowded canes invite mildew. Prune inner branches annually to keep air swirling, not stagnating.
Mulch Management: Wet mulch equals fungal fiesta. Keep mulch 2–3 inches away from cane bases and refresh annually to prevent soggy buildup.
Harvest Hygiene: Rinse clusters promptly and allow them to drip dry on a tray before storage—no damp piles that turn into a moldy mess.
Propagating New Plants from Cuttings
Softwood Cuttings (Spring): Snip 4–6 inches of new growth, strip lower leaves, dip in rooting hormone, and insert into a moist mix of peat and perlite. Cover with plastic to keep humidity high—your mini greenhouse awaits.
Hardwood Cuttings (Fall/Winter): Collect 8–10-inch dormant canes, heel them into a trench outside at a 30° angle, leave the tip exposed, and let nature do the work through winter. By spring, roots will have formed and you can pot them up.
Patience & Care: Mist daily, keep bright but indirect light, and check root development after 4–6 weeks. Then congratulate yourself on creating elderberry royalty.
Dealing with Pests & Critters
Aphids & Scale: Spot a sticky sheen or little bumps on stems? Blast them off with a strong spray of water or apply insecticidal soap. Repeat weekly until your canes sparkle.
Birds & Deer: Sure, birds love berries—but you need some, too. Hang lightweight netting over bushes at first blush of ripening. For deer, install a 6-foot fence or use deer-resistant repellents around the perimeter.
Controlling Suckers & Managing Spread
Why They Matter: Elderberry spreads via underground suckers—great for a hedge, annoying for a tidy bed.
Control Method: Snap or cut suckers at soil level monthly. For long-term prevention, install a root barrier (corrugated plastic sunk 12–18 inches deep).
Rejuvenation Pruning for Overly Woody Plants
When to Do It: Every 3–4 years, select the oldest ⅓ of canes and cut them to the ground in late winter. New, vigorous shoots will replace them.
Outcome: You’ll trade out saggy, low-yield wood for fresh, productive canes—no more half-hearted berry production.
Transplanting Established Shrubs
Timing: Early spring before bud break or early fall at least 6 weeks before frost.
Technique: Dig a wide perimeter—12–18 inches from the main stem—and lift the root ball intact. Replant immediately in amended soil, water deeply, and prune back by one-third for balance.
Soil Compaction & Root Aeration
Symptom: Stunted growth and poor drainage around established plants.
Fix: Gently fork the soil 6–8 inches away from the crown with an aeration tool, then top-dress with compost. Repeat annually for free-draining, oxygen-rich roots.
You’ve conquered cultivation, crafted potent remedies, and mastered troubleshooting—so what’s next, homestead hero?
Experiment & Share
Deepen Your Knowledge
Stay Connected
Subscribe to our newsletter for seasonal growing guides, exclusive recipes, and early access to our next deep dive.
Follow us on Instagram @OneStopGardenShopCo for daily inspo and behind-the-scenes bloopers (because even we spill syrup).


Comments