Search Results
Search this site
181 results found with an empty search
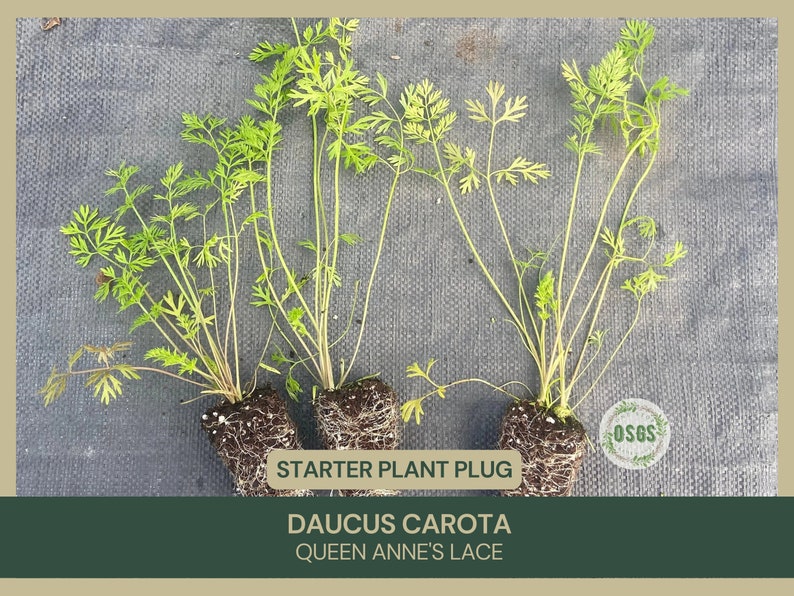
- Daucus carota
Daucus carotaCommon name: Queen Anne's Lace <<< Back Daucus carota Common name: Queen Anne's Lace Queen Anne's Lace: A Gardener's Guide to Cultivating Daucus Carota Message us Related Videos Related Blog Related Blog Buy Now Daucus carota, popularly known as Wild Carrot or Queen Anne's Lace, is a biennial plant known for its delicate, lace-like white flowers and feathery foliage. While it's the wild ancestor of the domestic carrot, it's primarily grown for ornamental purposes. Offers an airy, whimsical look to gardens with its white, umbrella-shaped flowers. Attracts a wide range of pollinators, including bees and butterflies. Easy to grow and often found naturalizing in meadows and along roadsides. Plant Care Daucus carota, commonly known as wild carrot or Queen Anne's lace, is a biennial plant well-known for its delicate, lacy white flowers and distinctive carrot-scented root. It is the wild ancestor of the cultivated carrot and offers both aesthetic and ecological benefits when grown in suitable environments. Here's a guide to caring for Daucus carota: Sunlight Requirements: Prefers full sun but can tolerate partial shade. Full sun encourages stronger flowering and seed production, which is important for its biennial reproduction cycle. Watering Needs: While Daucus carota is drought-tolerant once established, regular watering during its first growing season helps develop a strong root system. In its second year, it requires less water unless conditions are extremely dry. Soil Type and pH Preferences: Thrives in well-drained, sandy soils but can adapt to a range of soil types. It is not particular about soil pH, growing well in both acidic and alkaline environments. The key is good drainage to prevent root rot and other moisture-related issues. Temperature and Climate Requirements: Hardy across a wide range of climates, typically found in USDA Zones 3-9. It can withstand cold winters and moderate summers, making it adaptable to various garden settings. Pruning and Maintenance: Requires minimal maintenance. Deadheading the flowers before they set seed can help control its spread, as Daucus carota can become invasive in some areas. If grown in gardens, monitor its spread to keep it contained.. Daucus carota is valued for its ornamental qualities and its ability to attract a wide range of pollinators, including bees and butterflies. The plant's delicate white flowers make it a popular choice for wildflower meadows, informal garden settings, and as a natural border in cottage gardens. However, care should be taken to manage its growth, as it can self-seed prolifically and potentially outcompete other plants in certain environments. Planting and Propagation Planting Daucus carota, commonly known as wild carrot or Queen Anne's lace, introduces an intriguing and beneficial biennial plant to your garden. Recognized for its delicate, lacy white flowers that bloom in summer and its finely divided, fern-like foliage, wild carrot is not only visually appealing but also serves as a valuable resource for pollinators. This plant is the wild ancestor of the cultivated carrot and thrives in a variety of conditions. Here's a guide on how to plant and care for Daucus carota to enjoy its aesthetic appeal and ecological benefits. When to Plant Best Time: Sow seeds directly in the garden in late spring or early summer, after the last frost, as wild carrot germinates best in cooler soil. Zone Considerations: Hardy and adaptable, Daucus carota thrives in USDA zones 3-9. It prefers full sun but can tolerate partial shade. Selecting a Site Sunlight: Prefers full sun to partial shade. More sunlight encourages robust flowering. Soil: Thrives in well-drained sandy or loamy soil but is highly adaptable to various soil conditions, even those that are poor or rocky. Planting Steps Soil Preparation: Minimal soil preparation is needed as wild carrot is adaptable to poor soils. However, loosening the soil and removing large debris can facilitate better root growth and drainage. Spacing: Sow seeds thinly across the surface of the soil. Once seedlings have emerged, thin them to about 2-3 inches apart to allow for adequate growth. Planting Depth: Lightly cover the seeds with a thin layer of soil—no more than 1/4 inch deep. Wild carrot seeds require light for germination, so a sparse covering is optimal. Ongoing Care Watering: Water regularly to keep the soil moist but not waterlogged until seedlings are established. Mature plants are relatively drought-tolerant. Fertilizing: Fertilization is generally not necessary. Wild carrot thrives in low-fertility conditions, which mimic its natural habitat. Pruning: No pruning is required, but deadheading the flower heads can prevent the plant from self-seeding extensively, especially since it can become invasive in some areas. Propagation Seed: Wild carrot self-seeds prolifically if flower heads are left on the plant. Collect seeds in late summer if you wish to control the spread and sow them where desired. Planting Daucus carota adds not only visual interest with its attractive flowers and foliage but also supports local pollinators, enhancing the biodiversity of your garden. Its adaptability to various garden conditions and minimal care requirements make it an excellent choice for gardeners seeking to add a natural and low-maintenance element to their landscape. However, be mindful of its potential to self-seed and manage its spread to prevent it from becoming invasive in your garden. Pests and Diseases Daucus carota is generally robust but should be monitored for common garden issues. Pests: Generally pest-resistant but may occasionally attract aphids or carrot rust flies. Monitor plants regularly and treat pests as needed. Diseases: While typically hardy, it can occasionally suffer from fungal diseases in wet conditions. Ensure good air circulation and avoid overcrowding. Feeding and Fertilizing Initial Feeding : Apply a balanced, granular fertilizer with a lower nitrogen content and higher potassium and phosphorus levels (e.g., 5-10-10) before planting seeds. This helps promote strong root development rather than excessive foliage growth. Soil Preparation : Incorporate well-rotted compost into the soil before planting to improve soil structure and provide slow-release nutrients. Side-Dressing : Once the carrot tops are established and showing vigorous growth, a light side-dressing of a balanced fertilizer can encourage continued root development. Avoid Over-Fertilization : Excessive fertilization, especially with high nitrogen fertilizers, can lead to forked roots and poor flavor. Consistent Moisture : While not directly related to feeding, maintaining consistent soil moisture is crucial for uniform and healthy root growth. Mulching around the plants can help retain soil moisture and suppress weeds. pH Adjustment : Daucus carota prefers slightly acidic to neutral soil (pH 6.0-7.0). Testing soil pH and adjusting accordingly can improve nutrient availability and carrot quality. Seasonal Care Seasonal adjustments are key to the care of Daucus carota. Tends to be short-lived; allow some flowers to go to seed to ensure continual growth. Deadhead to control spread if you don't want it to self-seed excessively. In colder climates, the plant will die back in winter and may reseed in spring. Plant Uses Queen Anne's Lace has several uses in the garden and for wildlife. Ideal for cottage gardens, wildflower meadows, and as a border plant. Can be used in cut flower arrangements for its delicate, lacy appearance. Provides nectar for pollinators and habitat for beneficial insects. Varieties and Cultivars Daucus carota, commonly known as wild carrot or Queen Anne's lace, is celebrated for its delicate, lacy flowers and versatility in wildflower and pollinator gardens. While the species itself is widespread, there are several cultivated varieties that offer gardeners distinct decorative advantages and controlled growth habits. Here’s an overview of some notable cultivars of Daucus carota that can add beauty and interest to your garden: Daucus carota 'Dara' : This charming cultivar features flower umbels that range in color from soft pink to deep burgundy, adding a touch of whimsy and color variation that the standard white wild carrot lacks. 'Dara' is ideal for cutting gardens and is highly attractive to pollinators. 'Purple Kisses' : Similar to 'Dara', this cultivar produces flowers with hues of purple, pink, and sometimes white. It’s a bit more compact, making it suitable for smaller spaces or as a border plant in floral gardens. 'Snow White' : As the name suggests, this cultivar boasts pure white blooms that are denser and more robust than the typical wild carrot flowers. It offers a cleaner, more consistent look for formal gardens or as part of a monochromatic color scheme. 'Amazing Lace' : Known for its particularly intricate and finely textured flower heads, this cultivar enhances the natural lacy appearance that wild carrot is known for. It’s excellent for adding delicate structure to floral arrangements or as a focal point in garden beds. These varieties of Daucus carota are particularly valued for extending the aesthetic appeal of wild carrot beyond its usual wild setting, offering enhanced colors, forms, and adaptability for various garden styles. Whether used in wildflower meadows, cottage gardens, or as cut flowers, these cultivars contribute both beauty and biodiversity to garden landscapes. Growing Tips and Tricks Some additional tips can help you successfully grow and maintain Daucus carota. Thrives in full sun and well-drained soil. Can become weedy if allowed to self-seed extensively; manage by deadheading. Adds a natural, unstructured look to garden designs. Troubleshooting Common Problems Promptly addressing common issues can keep your Wild Carrot healthy. If plants appear stunted, they may need more sun or better soil drainage. Excessive moisture can lead to root rot; ensure soil is not overly wet. Control spread by removing unwanted seedlings and managing self-seeding. Read our blogs for more gardening tips!
- Mentha x Piperita
Common name: Peppermint <<< Back Mentha x Piperita Common name: Peppermint Message us Related Videos Etsy Shop eBay Shop Read our blogs for more gardening tips!
- Mentha Spicata
Common name: Strawberry Mint <<< Back Mentha Spicata Common name: Strawberry Mint Message us Related Videos Etsy Shop eBay Shop Read our blogs for more gardening tips!
- Coreopsis verticillata
Common name: Whorled Tickseed <<< Back Coreopsis verticillata Common name: Whorled Tickseed Message us Related Videos Etsy Shop eBay Shop Read our blogs for more gardening tips!
- Saururus cernuus
Common name: Lizard's Tail <<< Back Saururus cernuus Common name: Lizard's Tail Message us Related Videos Etsy Shop eBay Shop Read our blogs for more gardening tips!
- Matricaria Chamomilla
Common name: German Chamomile <<< Back Matricaria Chamomilla Common name: German Chamomile Message us Related Videos Etsy Shop eBay Shop Read our blogs for more gardening tips!
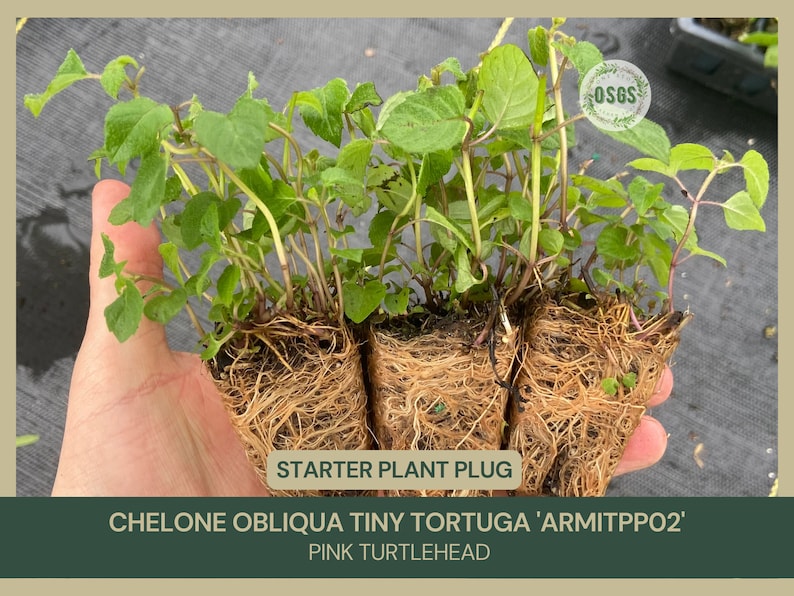
- Chelone obliqua tiny tortuga
Chelone obliqua tiny tortugaCommon name: Pink Turtlehead <<< Back Chelone obliqua tiny tortuga Common name: Pink Turtlehead Tiny Tortuga: A Guide to Cultivating Chelone Obliqua in Your Garden Message us Related Videos Related Blog Related Blog Buy Now Chelone obliqua 'Tiny Tortuga' is a charming perennial known for its vibrant pink turtlehead-shaped flowers and glossy, dark green foliage. This compact variety is perfect for adding a pop of color to small garden spaces or borders. Ideal for gardeners who want the beauty of Chelone obliqua in a smaller size. Attracts pollinators like bees and butterflies. Blooms in late summer to early fall, providing late-season interest in the garden. Plant Care Chelone obliqua 'Tiny Tortuga', a compact cultivar of the turtlehead plant, is prized for its dense spikes of deep pink flowers and dark green, glossy foliage. Its smaller stature makes it an excellent choice for a variety of garden settings, including borders and container plantings. Here’s a guide to caring for 'Tiny Tortuga': Sunlight Requirements : Prefers partial shade but can tolerate full sun in cooler climates. The ideal location offers morning sunlight with afternoon shade, especially in regions with hot summers, to protect the foliage and ensure vibrant flower color. Watering Needs : 'Tiny Tortuga' thrives in evenly moist soils and requires regular watering to maintain consistent soil moisture. It's particularly important during dry spells and in sunnier locations. Avoid letting the soil dry out completely, as this plant prefers damp conditions. Soil Type and pH Preferences : Performs best in rich, moist, well-drained soil. While adaptable to a range of soil types, 'Tiny Tortuga' prefers slightly acidic to neutral pH levels. Incorporating organic matter can improve soil fertility and moisture retention. Temperature and Climate Requirements : Hardy in USDA Zones 4-8, 'Tiny Tortuga' is suited to a wide range of climates. It can withstand cold winters and moderate summers but may require protection from extreme heat or direct afternoon sunlight in hotter areas. Pruning and Maintenance : Minimal maintenance is required once established. Deadheading spent flowers can encourage a second flush of blooms and extend the flowering period. Cutting back the foliage in late fall or early spring promotes healthy growth and maintains a tidy appearance. Propagation : While 'Tiny Tortuga' can be propagated by division, it's essential to respect plant patents and breeders' rights. Division in early spring or fall can rejuvenate older plants and help manage their size. Chelone obliqua 'Tiny Tortuga' is a charming addition to any garden, offering a splash of color in late summer to early fall when many other plants begin to fade. Its compact size and attractive foliage make it a versatile choice for small gardens, mixed borders, and container arrangements. Additionally, its flowers attract pollinators like bees and butterflies, adding to the biodiversity of the garden. Whether planted in groups or as a single specimen, 'Tiny Tortuga' is sure to bring visual interest and ecological benefits to your outdoor space. Planting and Propagation Planting Chelone obliqua 'Tiny Tortuga', a compact cultivar of the Turtlehead, introduces a vibrant perennial with deep pink, turtlehead-shaped flowers that bloom from mid to late summer. This dwarf variety is particularly appealing for small gardens, borders, or container planting, offering rich color and attracting pollinators such as bees and butterflies. 'Tiny Tortuga' is notable for its manageable size, glossy, dark green foliage, and resilience in various garden settings. Here's a guide on how to plant and care for Chelone obliqua 'Tiny Tortuga' to bring a splash of color and life to your garden. When to Plant Best Time: Early spring or fall are ideal for planting, allowing the plant to establish its root system in moderate temperatures. Zone Considerations: Hardy in USDA zones 4-8, 'Tiny Tortuga' is adaptable to a wide range of climates, flourishing in areas with consistent moisture. Selecting a Site Sunlight: Prefers partial shade but can tolerate full sun if the soil is kept consistently moist. In hotter climates, afternoon shade is beneficial to prevent stress on the plant. Soil: Thrives in rich, moist, well-drained soil. While it is adaptable to various soil types, maintaining moisture without waterlogging is crucial for optimal growth and blooming. Planting Steps Soil Preparation: Enrich the planting area with organic matter, such as compost, to improve soil fertility and moisture retention. This is particularly important in sandy soils or areas prone to drying out. Spacing: Space plants about 18 inches apart. Despite its compact size, 'Tiny Tortuga' needs room to spread and for air to circulate around the plants, reducing the risk of disease. Planting Depth: Dig a hole that is as deep as the root ball and twice as wide. Position the plant so the top of the root ball is level with the soil surface, then backfill and gently firm the soil around it. Ongoing Care Watering: Keep the soil consistently moist, especially in the first growing season to ensure establishment. 'Tiny Tortuga' does not tolerate drought well, so regular watering during dry periods is essential. Fertilizing: Apply a balanced, slow-release fertilizer in the spring to support vigorous growth and abundant flowering. Avoid over-fertilizing, which can promote foliage at the expense of flowers. Pruning: Deadheading spent flowers may encourage reblooming and prevents the plant from self-seeding excessively. Cut back the foliage to the ground in late fall or early spring to encourage fresh, healthy growth. Propagation Division: Divide plants in early spring every few years to maintain vigor and to propagate new plants. 'Tiny Tortuga' benefits from division as it rejuvenates the plant and helps to keep it healthy. Seed: While 'Tiny Tortuga' can be grown from seed, division is often preferred to maintain the true characteristics of this cultivar. Incorporating Chelone obliqua 'Tiny Tortuga' into your garden not only provides late summer to early fall interest with its vibrant blooms but also supports pollinators at a crucial time of year. Its compact size and colorful presence make it an excellent choice for various garden designs, from woodland edges to formal borders and containers. Pests and Diseases 'Tiny Tortuga' is relatively resistant to pests and diseases but should still be monitored. Pests: Generally, 'Tiny Tortuga' is pest-resistant. Keep an eye out for common garden pests like aphids and treat them as necessary. Diseases: It is resistant to most diseases, especially when proper care is taken to ensure good soil drainage and to avoid waterlogging. Feeding and Fertilizing Chelone obliqua 'Tiny Tortuga', a compact cultivar of the native Turtlehead, is admired for its glossy, deep green foliage and vibrant pink to purple flowers that resemble a turtle's head. This perennial blooms in late summer to early fall, offering a splash of color when many other plants are beginning to fade. 'Tiny Tortuga' is particularly suited to small gardens or borders due to its more diminutive size, reaching only about 16 to 20 inches in height. It thrives in moist conditions, making it an ideal candidate for rain gardens, pond edges, or moist woodland settings. In fertile soil, 'Tiny Tortuga' requires minimal additional fertilization. Planting and Care Soil and Site : Prefers rich, consistently moist soil and can tolerate a range of light conditions, from full sun to partial shade. Its compact size and moisture-loving nature make it suitable for a variety of garden settings, including container gardens. Watering : Regular watering is essential to maintain the moist soil conditions that 'Tiny Tortuga' thrives in. It is particularly important during dry spells and in regions with hot summers to ensure the soil does not dry out. Mulching : Applying a layer of organic mulch helps retain soil moisture, suppress weeds, and maintain a cooler root environment. Be careful to keep mulch away from the base of the stems to prevent rot. Maintenance and Pruning Pruning : Little pruning is needed other than the removal of spent flowers to keep the plant looking tidy and possibly encourage a second flush of blooms. In late autumn or early spring, cut back the dead foliage to the ground to encourage healthy new growth. Division : While division is not frequently necessary due to its compact nature, 'Tiny Tortuga' can be divided every 3-4 years in the spring or fall to rejuvenate the plant and help maintain its vigor. Environmental Impact Supporting Wildlife : Like its parent species, 'Tiny Tortuga' is valuable for attracting pollinators, including bees and butterflies. It is particularly beneficial for providing late-season nectar sources when many other flowers have finished blooming. Considerations : Its compact size and attractive features make 'Tiny Tortuga' a versatile addition to any garden, especially those with limited space or specific moisture requirements. It's an excellent choice for gardeners looking to support pollinator populations while adding late-season color. Landscape Use : Due to its smaller stature, 'Tiny Tortuga' is perfect for the front of perennial borders, rain gardens, alongside ponds or streams, or even in containers. It pairs well with other moisture-loving plants, offering a cohesive look to garden designs focused on wetland or woodland themes. Chelone obliqua 'Tiny Tortuga' provides gardeners with a unique opportunity to incorporate a moisture-tolerant, pollinator-friendly plant into smaller garden spaces without sacrificing visual impact. Its vibrant blooms and glossy foliage add beauty and interest to the garden in late summer and fall, a time when many other plants are winding down for the season. Seasonal Care Chelone obliqua 'Tiny Tortuga', a more compact cultivar of the turtlehead species, is an attractive perennial known for its deep pink flowers that resemble a turtle's head, hence the name. This particular cultivar is appreciated for its smaller stature, making it an excellent choice for gardeners with limited space or those looking to add a pop of color to the front of a border or a rain garden. Like its larger relatives, 'Tiny Tortuga' thrives in moist conditions and is particularly effective in attracting pollinators, including butterflies. Here's how to care for Chelone obliqua 'Tiny Tortuga' throughout the seasons: Spring Cleanup: Remove any remaining debris from winter to clear the way for new growth. Early spring is also an ideal time for pruning to maintain shape and encourage bushier growth. Planting: If you're adding 'Tiny Tortuga' to your garden, choose a spot with full sun to partial shade. While it can tolerate some dryness once established, it prefers moist, well-drained soil. Planting in spring after the risk of frost has passed is ideal. Watering: Regular watering is crucial as the plants establish. Aim to keep the soil consistently moist but not waterlogged. Mulching: Apply a layer of organic mulch to retain moisture, suppress weeds, and regulate soil temperature. Summer Watering: Continue to ensure that 'Tiny Tortuga' receives adequate water, particularly during hot, dry spells. Consistent moisture is key to its growth and flowering. Maintenance: This cultivar is relatively low maintenance. Watch for signs of pests or diseases, but generally, 'Tiny Tortuga' is quite robust and problem-free. Fertilizing: A light application of a balanced, slow-release fertilizer in early summer can support healthy growth and flowering, especially if your soil is less fertile. Fall Enjoy the Flowers: 'Tiny Tortuga' blooms in late summer into fall, offering vibrant color when many other plants begin to fade. The blooms are attractive to bees and butterflies, providing an essential late-season nectar source. Preparation for Winter: After the first hard frost, you can cut back the foliage to ground level. Alternatively, you may choose to leave the plant standing to provide winter interest and habitat for wildlife. Winter Protection: In colder zones, a layer of mulch applied after the ground freezes can help protect the roots from temperature fluctuations. Planning: Winter is a good time to evaluate your garden and plan for any additions or changes. 'Tiny Tortuga' can be divided in early spring if you wish to propagate more plants. Year-Round Tips Soil and Site: Prefers rich, consistently moist soil. It's adaptable to various soil types as long as moisture conditions are met. Division: While 'Tiny Tortuga' is compact and may not require division as frequently as other perennials, doing so every 3-4 years in spring can rejuvenate the plant and increase your stock. Companion Plants: Pair with other moisture-loving plants such as ferns, Astilbe, and Lobelia for a cohesive, moisture-tolerant garden design. 'Tiny Tortuga' can also complement taller plants in the back of a border with its lower growth habit and vibrant blooms. By following these care instructions, Chelone obliqua 'Tiny Tortuga' will flourish in your garden, offering a beautiful display of deep pink flowers and contributing to the biodiversity of your outdoor space by attracting pollinators. Plant Uses Chelone obliqua 'Tiny Tortuga' is versatile and can be used in various garden settings. Excellent for borders, woodland gardens, and along streams or ponds. Works well in container gardens due to its compact size. Its late blooming period makes it valuable for extending garden interest. Varieties and Cultivars Chelone obliqua 'Tiny Tortuga', a distinctive dwarf cultivar of the turtlehead plant, is celebrated for its compact form and striking pink blooms. Ideal for a variety of garden settings, this plant thrives in part to full shade and prefers moist, well-drained soil, making it a perfect addition to rain gardens, moist woodland areas, and for adding late-season color to borders. Here's a detailed overview highlighting the key features and garden uses of Chelone obliqua 'Tiny Tortuga': Chelone obliqua 'Tiny Tortuga' Compact Size : Reaches 12 to 16 inches in height, suitable for small gardens, front of borders, or container gardening. Vibrant Flowers : Produces vibrant pink blooms that resemble a turtle's head, offering visual interest from late summer to early fall. Shade Tolerance : Prefers part to full shade, ideal for woodland gardens or shaded areas. Moisture Preferences : Thrives in moist, well-drained soil, perfect for rain gardens or near water features. Pollinator Friendly : Attracts bees and butterflies, supporting pollinator populations when other plants begin to fade. Low Maintenance : Requires minimal care, with occasional deadheading to encourage continued blooming. Disease Resistant : Exhibits robust growth with good resistance to common garden pests and diseases. By incorporating 'Tiny Tortuga' into your garden, you not only add a pop of late-season color but also contribute to the biodiversity of your local ecosystem. Its compact size and low maintenance needs make it an excellent choice for gardeners looking to enhance the beauty and ecological function of their shaded or moist garden areas. Growing Tips and Tricks Enhance your gardening experience with these additional tips for growing 'Tiny Tortuga'. Prefers consistently moist conditions; ideal for areas with wet soil. Deadheading spent blooms can encourage more flowering. Thrives alongside other moisture-loving plants like hostas and ferns. Troubleshooting Common Problems Quick action can resolve common issues, ensuring the health of your plant. If the plant appears wilted or stressed, check for soil moisture; it may need more water. Stunted growth can indicate poor soil fertility; amend with compost if needed. Ensure adequate spacing and air circulation to prevent fungal diseases. Read our blogs for more gardening tips!
- Salvia Elegans
Common name: Pineapple Sage <<< Back Salvia Elegans Common name: Pineapple Sage Message us Related Videos Etsy Shop eBay Shop Read our blogs for more gardening tips!
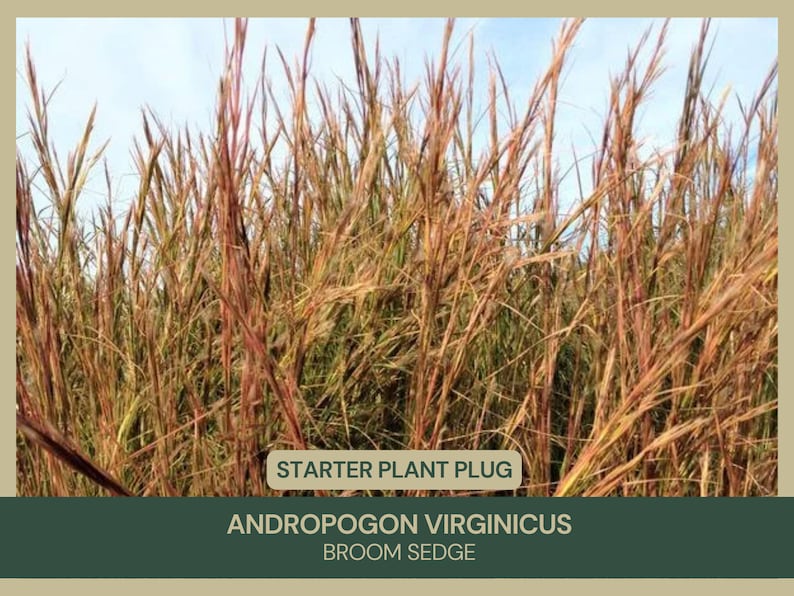
- Andropogon virginicus
Andropogon virginicusCommon Name: Broomsedge Bluestem <<< Back Andropogon virginicus Common Name: Broomsedge Bluestem Embracing the Wild: A Gardener’s Guide to Andropogon Virginicus Message us Related Videos Related Blog Related Blog Buy Now Andropogon virginicus, widely known as Broomsedge Bluestem, is a native perennial grass celebrated for its adaptability and distinctive appearance. This hardy grass is often utilized in naturalized settings, providing both ecological benefits and aesthetic interest. Known for its fine-textured, upright clumps that turn a striking bronze-orange in fall. Thrives in a variety of conditions, often found in meadows, open woods, and roadside areas. Ideal for native plant gardens, erosion control, and as an ornamental grass in various landscapes. Plant Care Andropogon virginicus , commonly known as broomsedge bluestem, is a perennial grass that adds striking texture and color to landscapes, especially noted for its coppery to silver fall and winter coloration. Here’s how to care for this resilient and visually captivating grass: Sunlight Requirements: This plant thrives in full sun. It needs a minimum of 6 hours of direct sunlight daily to develop its best form and coloration. Watering Needs: Once established, Andropogon virginicus is highly drought-tolerant. It requires minimal watering, making it an excellent choice for xeriscaping or areas prone to dry spells. Water it during long periods of drought to maintain its health. Soil Type and pH Preferences: Adaptable to a wide range of soil types, including poor soils, but it prefers well-draining conditions. It tolerates both acidic and alkaline pH levels, making it suitable for various garden settings. Temperature and Climate Requirements: Hardy in USDA Zones 3-9, Andropogon virginicus is versatile and can withstand a wide range of temperatures, from hot summers to cold winters, without significant issues. Pruning and Maintenance: Minimal maintenance is required. To keep your garden looking tidy, you can cut back the foliage in late winter or early spring before new growth starts. This timing allows the plant to maintain its winter interest and provides habitat for wildlife during the colder months. Andropogon virginicus is not just a plant for visual appeal; it’s also valuable for soil stabilization and creating naturalistic or wildflower gardens. Its adaptability to various conditions and minimal care requirements make it a worthwhile addition to many landscapes. How to Plant Andropogon virginicus Planting Andropogon virginicus, commonly known as Broomsedge Bluestem, introduces a native warm-season grass to your garden or landscape, known for its striking fall and winter coloration. This grass provides texture and movement in the garden, with its upright clumps turning a brilliant orange-red in the fall. Here's how to successfully plant and care for Andropogon virginicus. When to Plant Best Time: The optimal time for planting Andropogon virginicus is in the spring, after the last frost, or in early fall. These times allow the plant to establish itself before the extremes of winter or summer. Zone Considerations: Andropogon virginicus is hardy in USDA zones 2-9, showcasing its adaptability to a wide range of climates. Selecting a Site Sunlight: Full sun is best for this grass, as it thrives with 6 or more hours of direct sunlight daily. Soil: Andropogon virginicus is not particular about soil type but prefers well-drained soils. It's tolerant of poor soils, including dry, sandy, or rocky conditions, making it a versatile choice for challenging sites. Planting Steps Soil Preparation: While Andropogon virginicus can tolerate poor soils, incorporating organic matter into the planting site can encourage vigorous growth. Loosen the soil to a depth of 12 inches. Spacing: Space plants about 2-3 feet apart. Although individual plants are slender, they can spread to form dense clumps. Planting Depth: Dig a hole as deep as the root ball and twice as wide. Set the plant in the hole so the top of the root ball is level with the surrounding soil surface. Backfill the hole, gently firming the soil to remove air pockets. Watering: Water well after planting. While Andropogon virginicus is drought-tolerant once established, regular watering during the first growing season helps to establish a deep and extensive root system. Ongoing Care Watering: Mature Andropogon virginicus requires minimal watering, making it an excellent choice for xeriscaping or naturalized areas. Fertilizing: Fertilization is generally not necessary. This grass prefers lean soils, and too much fertilizer can inhibit its natural growth habits and coloration. Pruning: Cut back the foliage to about 4 inches above the ground in late winter or early spring before new growth starts. This maintains tidiness and allows new shoots to grow without competition from old growth. Propagation Division: Divide clumps in late winter or early spring every few years to rejuvenate older plants and manage their spread. Seed: Andropogon virginicus can be propagated by seed sown directly in the garden in fall or spring. However, germination rates can be variable, and seedlings may take time to establish. By incorporating Andropogon virginicus into your garden, you'll add a resilient, low-maintenance plant that offers year-round interest, particularly in the fall and winter months when its foliage and seed heads catch the light and provide striking visual interest. Pests and Diseases Broomsedge Bluestem is generally robust and resistant to pests and diseases. Rarely troubled by pests or diseases, making it a low-maintenance choice for gardens. Good air circulation and proper spacing help maintain plant health. Feeding and Fertilizing Asclepias incarnata Feeding and fertilizing Asclepias incarnata, commonly known as Swamp Milkweed, requires an understanding of the plant's specific needs to support its vibrant flowers and attractive foliage. Despite being relatively low-maintenance, appropriate nutrition can greatly benefit this native perennial, especially in garden settings. Here's a guide to effectively feeding and fertilizing your Asclepias incarnata. General Guidelines Minimal Fertilizer Requirement: Asclepias incarnata thrives in a variety of soil conditions but prefers moist, well-drained sites. It is generally low-maintenance and does not require high levels of fertilizer. Excessive fertilization can deter flowering and promote too much vegetative growth. Soil Testing: Conducting a soil test can be helpful to determine if your soil lacks any essential nutrients that Asclepias incarnata may benefit from. This step is crucial to avoid over-fertilization, which can harm the plant and the environment. Fertilizing Schedule Early Spring Feeding: If needed, apply a light application of a balanced fertilizer in early spring as new growth appears. A fertilizer with an N-P-K ratio of 10-10-10, applied sparingly, can provide the necessary nutrients without overwhelming the plant. Caution with Nitrogen: Be cautious with nitrogen-heavy fertilizers, as they can encourage foliage growth at the expense of flowers. Asclepias incarnata's primary attraction is its blooms, which are vital for attracting pollinators, especially monarch butterflies. Organic Alternatives Compost: Adding a layer of compost around the base of the plant in the spring can provide slow-release nutrients, enhance soil moisture retention, and improve soil structure, all beneficial to Asclepias incarnata's growth. Mulching: A layer of organic mulch can help maintain soil moisture, suppress weed growth, and keep root temperatures stable. As it breaks down, mulch also contributes organic matter to the soil, feeding Asclepias incarnata indirectly. By following these feeding and fertilizing tips, your Asclepias incarnata should thrive, producing lush foliage and vibrant flowers that attract a variety of pollinators to your garden. This plant's ability to support wildlife, particularly monarch butterflies, makes it a valuable addition to any garden aiming to promote biodiversity. Seasonal Care Spring Cleanup: Start the season by removing any dead foliage and debris around your Andropogon virginicus plants. This cleanup helps prevent pests and diseases from taking hold. Planting: Early spring, as soon as the soil is workable, is the perfect time to plant Andropogon virginicus. Planting during this time allows the plants to establish their root systems well before the summer heat intensifies. Mulching: Apply a thin layer of organic mulch around your plants. The mulch helps maintain soil moisture, regulates soil temperature, and keeps weeds at bay. Be careful to avoid piling mulch directly against the plant stems to prevent rot. Watering: Begin a regular watering schedule if the spring weather is drier than usual. While Andropogon virginicus is drought-tolerant, young plants especially benefit from consistent moisture as they establish. Summer Watering: Andropogon virginicus is highly drought-resistant and usually does not need extra watering once it's established. However, young or newly planted grasses might require occasional watering during extended dry spells. Monitoring: Regularly check your plants for any signs of stress, disease, or pest infestation, although Andropogon virginicus is generally very resilient and pest-resistant. Enjoying: Summer is when Andropogon virginicus truly begins to stand out, displaying its unique coloration and structural form, which adds depth and interest to your garden landscape. Fall Seed Heads: In the fall, Andropogon virginicus produces seed heads that contribute additional visual appeal. You have the option to leave these on the plants throughout the winter to enhance the garden's aesthetic and to provide food for birds. Cutting Back: You can choose to cut the grass back in late fall for a neater garden appearance and to control self-seeding, or you might leave it standing to enjoy its beauty in winter and offer habitat for wildlife. Winter Protection: Andropogon virginicus does not require special care over the winter, as it is well-adapted to cold temperatures. Planning: Use the winter months as an opportunity to assess your garden and decide if you wish to incorporate additional Andropogon virginicus plants based on their performance and aesthetic contribution to your garden in the past year. Year-Round Tips Fertilization: Typically, Andropogon virginicus doesn't need to be fertilized, particularly if it's planted in native or well-adapted soil types. Over-fertilizing can lead to excessively lush growth that is more susceptible to drought and stress. Soil Care: Ensure your soil has good drainage. Andropogon virginicus can adapt to various soil types but prefers conditions that are not overly wet. Pest and Disease Management: This grass variety is notably resistant to pests and diseases. Nonetheless, maintaining good cultural practices is crucial for keeping your plants healthy and thriving. By adhering to this seasonal care guide, your Andropogon virginicus plants should flourish, providing beautiful foliage, fall color, and structural interest to your landscape throughout the year. Plant Uses Andropogon virginicus is versatile and serves multiple roles in the garden. Perfect for naturalized or wildflower gardens, meadow plantings, and ecological restoration projects. Provides habitat and food for wildlife. Its fall and winter appearance offers ornamental value throughout the seasons. Varieties and Cultivars While Andropogon virginicus is a specific species, exploring other native grasses can add diversity. Consider mixing with other native grasses and perennials for a varied, naturalistic landscape. Each grass species offers unique characteristics, making them great for ecological and ornamental use. Growing Tips and Tricks Some additional insights can enhance your experience of growing Broomsedge Bluestem. Prefers a sunny location with well-draining soil. Tolerates poor soil conditions, making it suitable for challenging sites. Requires minimal care, making it ideal for low-maintenance or natural landscapes. Troubleshooting Common Problems Broomsedge Bluestem is a hardy plant, but there are a few considerations for optimal growth. If growth is sparse, check for adequate sunlight. Overly rich or wet soil can inhibit its characteristic growth form and coloration. Manage its spread in garden settings, as it can self-seed in favorable conditions. Read our blogs for more gardening tips!
- Mentha Suavelons 'Variegata'
Common name: Pineapple Mint <<< Back Mentha Suavelons 'Variegata' Common name: Pineapple Mint Message us Related Videos Etsy Shop eBay Shop Read our blogs for more gardening tips!
- Achillea millefolium 'Summer Taffy'
Achillea millefolium 'Summer Taffy'Common Name: Yarrow Terracota <<< Back Achillea millefolium 'Summer Taffy' Common Name: Yarrow Terracota Your Comprehensive Guide to Cultivating and Caring for Yarrow Terracota Message us Related Videos Related Blog Related Blog Buy Now Achillea Millefolium 'Sassy Summer Taffy', commonly referred to as Yarrow Terracota, is a vibrant perennial known for its striking terracotta-colored flowers and fern-like foliage. Originating from a robust family of plants, it's cherished for both its beauty and resilience. Easy to grow and maintain, making it perfect for both beginners and seasoned gardeners. Thrives in a variety of climates, adaptable to different environmental conditions. Its blooms are not only visually appealing but also attract beneficial insects to your garden. Plant Care For Achillea millefolium 'Summer Taffy' , a delightful variety in the yarrow family, here's how you can ensure it thrives in your garden: Sunlight Requirements: 'Summer Taffy' enjoys basking in full sun. Aim to provide it with 6-8 hours of direct sunlight daily for optimal growth and flowering. Watering Needs: This plant appreciates deep watering when the top inch of the soil appears dry. While it's drought-tolerant once fully established, consistent watering during extended periods without rain will keep it looking its best. Soil Type and pH Preferences: A well-draining soil composition is crucial for 'Summer Taffy'. It flourishes in a slightly alkaline to neutral pH environment, with ideal soil pH values ranging from 6.0 to 7.5. Temperature and Climate Requirements: Hardy across USDA Zones 3-8, 'Summer Taffy' can withstand cold winters. Proper drainage is vital to prevent root rot in wetter climates. Pruning and Maintenance: To promote more vigorous blooming, deadhead the spent flowers regularly. Trimming the plant down to its basal foliage in the late fall or early spring will help rejuvenate its growth and maintain its vigor. By following these care guidelines, your Achillea millefolium 'Summer Taffy' will not only grow but flourish, adding a splash of color and texture to your garden. How to Plant Achillea millefolium 'Summer Taffy' Planting Achillea millefolium 'Summer Taffy', a captivating variety of Yarrow with its unique pinkish-red blooms, can bring a delightful splash of color to your garden landscape. Here's a comprehensive guide on how to plant and nurture Achillea millefolium 'Summer Taffy'. When to Plant Best Time: The optimal planting times are in the early spring or autumn. Achillea millefolium 'Summer Taffy' is cold-hardy, allowing for early spring planting as soon as the soil is workable, or in autumn before the onset of frost. Zone Considerations: This plant flourishes in USDA zones 3-9. Depending on your specific zone, the ideal planting period may slightly adjust. Selecting a Site Sunlight: A location with full sun is essential, as Achillea millefolium 'Summer Taffy' requires at least 6 hours of direct sunlight daily for optimal growth. Soil: Well-draining soil is crucial for health. The plant is susceptible to root rot in overly moist conditions. Enhance heavy or clay soils with sand or organic material to improve drainage. Planting Steps Soil Preparation: Loosen the soil to a depth of about 12-15 inches, integrating compost or aged manure to enrich the soil's nutrients. Spacing: Space Achillea millefolium 'Summer Taffy' seedlings or plants approximately 18-24 inches apart to ensure sufficient air flow and minimize disease risk. Planting Depth: Excavate a hole that is both as deep and twice as wide as the root ball. Place the plant in the hole so the root ball's top is level with the surrounding soil surface. Refill the hole with soil, firmly pressing around the roots. Watering: After planting, water the area thoroughly. While Achillea millefolium 'Summer Taffy' is drought-tolerant once established, maintaining slight soil moisture aids in plant establishment. Mulching: Apply a 2-inch layer of mulch around the plants to help retain soil moisture, moderate soil temperature, and reduce weed growth. Ongoing Care Watering: Regularly water the young plants until they are fully established. Mature specimens need minimal watering and can withstand drought conditions. Fertilizing: Achillea millefolium 'Summer Taffy' requires minimal fertilization. Excessive nutrients can cause spindly growth and diminish blooming. Apply a balanced fertilizer lightly in spring if necessary. Deadheading: To encourage additional blooming and prevent excessive self-seeding, remove faded flowers. Division: To maintain vigor and prevent overcrowding, divide the plants every 3-4 years in either spring or autumn. By adhering to these instructions, your Achillea millefolium 'Summer Taffy' will thrive, providing your garden with striking pinkish-red flowers from late spring through autumn. Pests and Diseases While Yarrow Terracota is relatively pest and disease resistant, it's important to be vigilant to ensure the health of your plants. Watch out for aphids and spider mites; treat with insecticidal soap if necessary. Fungal diseases like powdery mildew can occur in humid conditions; improve air circulation and reduce watering. Regular inspection can prevent most issues before they become severe. Feeding and Fertilizing Feeding and fertilizing Achillea millefolium 'Summer Taffy' is an easy task, given the plant's resilience and minimal nutritional requirements. Nonetheless, proper nourishment can bolster its growth and enhance its blooming performance. Follow these tips to ensure your Achillea 'Summer Taffy' receives the right amount of nutrients. General Guidelines Low Fertilizer Needs: Achillea millefolium 'Summer Taffy' flourishes in soils ranging from moderate to poor fertility. Over-fertilization can lead to lush foliage at the expense of bloom production and increase the plant's vulnerability to diseases. Soil Test: Conducting a soil test prior to fertilizer application is wise. This will reveal the existing nutrient levels in your soil and help determine whether your Achillea needs additional fertilization. Fertilizing Schedule Spring Application: Should your soil test suggest a need for nutrients, apply a light application of balanced, slow-release fertilizer as the plant resumes growth in early spring. Opt for a fertilizer with an N-P-K ratio (Nitrogen-Phosphorus-Potassium) of 10-10-10 or 20-20-20. Avoid Over-fertilizing: Over-fertilizing is a common mistake that can result in spindly plants, weak stems, and diminished flowering. If your Achillea 'Summer Taffy' is thriving and flowering well, additional fertilizer may not be necessary. Organic Alternatives Compost and Manure: Enriching the soil with compost or aged manure can be a superior alternative to synthetic fertilizers. These organic options enhance soil texture, gradually release nutrients, and support robust plant development without the risk of over-fertilizing. Mulching: A layer of organic mulch around your Achillea not only conserves soil moisture and deters weeds but also breaks down over time to slowly release nutrients back into the soil. By following these feeding and fertilizing guidelines, your Achillea millefolium 'Summer Taffy' will be well-nourished, supporting its lush foliage and vibrant blooms throughout the growing season. Seasonal Care Caring for Agastache urticifolia 'Blue Fortune' throughout the different seasons involves specific practices to ensure the plants remain healthy, vibrant, and blooming profusely. Here's a seasonal care guide for Agastache urticifolia 'Blue Fortune' that will help you maintain your plants year-round. Spring Cleanup : Begin with cleaning up any dead foliage and debris from around your plants to prevent disease and pests. Dividing: Early spring, before new growth starts, is an ideal time to divide mature plants (every 3-4 years) to maintain vigor and to propagate. This helps prevent overcrowding and promotes healthy growth. Planting : You can plant new Agastache urticifolia 'Blue Fortune' plants as soon as the soil is workable. Spring is a great time for planting to allow the root system to establish before the hot summer months. Mulching : Apply a thin layer of organic mulch to conserve moisture, regulate soil temperature, and suppress weeds. Avoid mulching too close to the stem to prevent rot. Watering: Begin regular watering if the spring is particularly dry, ensuring the soil is well-drained to prevent waterlogging. Summer Watering : Agastache urticifolia 'Blue Fortune' is drought-tolerant but will benefit from watering during prolonged dry spells, especially newly planted ones that haven't fully established. Deadheading : Regularly remove spent flowers to encourage continuous blooming throughout the summer. Some varieties may rebloom if deadheaded. Monitoring : Keep an eye out for pests and diseases, although Agastache urticifolia 'Blue Fortune' is generally resistant to many common garden problems. Fall Deadheading/Pruning : You can choose to leave some spent blooms on the plants in fall to provide winter interest and food for birds. Alternatively, trim the plants down to the ground after the first hard frost if you prefer tidiness. Mulching : Refresh the mulch layer after trimming the plants to protect the roots over the winter, especially in colder climates. Dividing: In addition to spring, early fall is also a good time to divide plants if you didn't do it in the spring. Ensure there's enough time for the plants to establish before the first frost. Winter Protection : In very cold climates, additional mulch can be applied after the ground freezes to protect the plants from freeze-thaw cycles that can heave the roots out of the ground. Planning : Winter is an excellent time to assess your garden's performance over the past year and plan any changes or additions for the next season. Year-Round Tips Fertilization : Agastache urticifolia 'Blue Fortune' generally does not require much fertilization, especially if planted in fertile soil. If necessary, a light application of a balanced fertilizer in early spring is sufficient. Soil Care : Ensure the soil remains well-drained; amend heavy clay soils with organic matter to improve drainage. Pest and Disease Management : While generally low-maintenance, be vigilant about potential problems such as aphids or powdery mildew, and treat as necessary. By following this seasonal care guide, your Agastache urticifolia 'Blue Fortune' plants should thrive and produce beautiful blooms year after year, contributing to a vibrant and dynamic garden landscape. Plant Uses Yarrow Terracota is not just a beautiful addition to your garden but also has various practical uses. Ideal for borders, rock gardens, and as a cut flower for arrangements. Can be used in herbal remedies, known for its anti-inflammatory properties. Attracts pollinators like bees and butterflies, enhancing the biodiversity of your garden. Varieties and Cultivars Each variety has unique characteristics, making Achillea millefolium 'Summer Taffy' a versatile choice for any garden. Here's an overview of some popular varieties and cultivars of Achillea millefolium 'Summer Taffy': Achillea millefolium 'Summer Taffy' 'Candy Floss' : This cultivar features soft pink flowers that deepen in color as they age, set against dark green foliage. It's known for its compact growth and extended blooming period. 'Sugar Plum' : Part of the 'Summer Taffy' series, 'Sugar Plum' boasts vibrant, plum-purple flowers with small, tightly packed florets. Its compact size and long-lasting blooms make it a favorite among gardeners. 'Peaches and Cream' : A delightful variety with flowers that transition from a soft peach to creamy yellow centers as they mature. 'Peaches and Cream' is celebrated for its unique color palette and drought tolerance. 'Lemon Meringue' : Characterized by its bright, lemon-yellow flowers that stand out against silvery-green foliage, 'Lemon Meringue' is a cheerful addition to the 'Summer Taffy' series. It thrives in full sun and well-drained soil, making it a resilient choice for sunny borders. These 'Summer Taffy' cultivars of Achillea millefolium offer a range of colors and sizes that can fit any garden theme or design, providing vibrant colors, attractive foliage, and a long blooming season. Growing Tips and Tricks A few extra tips and tricks can make a significant difference in the health and appearance of your Yarrow Terracota. Deadheading spent blooms encourages more flowering. Yarrow can spread; consider containing it in specific garden areas. Thrives in tough conditions and is a great choice for xeriscaping. Troubleshooting Common Problems Addressing common problems promptly can save your Yarrow Terracota from potential damage. Yellowing leaves may indicate overwatering; reduce frequency and ensure good drainage. If plants are leggy, they might not be receiving enough sunlight. In case of stunted growth, test soil nutrients and adjust fertilization accordingly. Read our blogs for more gardening tips!
- Populus deltoides
Cottonwood <<< Back Populus deltoides Cottonwood Discover the dynamic beauty of Populus deltoides , the Eastern Cottonwood. Message us Related Videos Related Blog Related Blog Buy Now Introduction Populus deltoides , or Eastern Cottonwood, is a fast-growing deciduous tree native to North America, notable for its triangular leaves and cotton-like seeds. This tree is well-suited for large landscapes and riparian zones, providing both ecological advantages and striking visual appeal. Characterized by Triangular, toothed leaves and distinctive cotton-like seed dispersal that adds a unique texture to the landscape. Thrives in Moist, well-drained soils, making it ideal for riverbanks, floodplains, and other areas with consistent water availability. Provides Shade and habitat for wildlife, enhancing the ecological diversity and health of large garden spaces. Plant Care Populus deltoides , commonly known as eastern cottonwood, is a fast-growing deciduous tree known for its large, triangular leaves and distinctive cotton-like seeds. Here’s a guide to caring for Populus deltoides: Sunlight Requirements : Prefers full sun. Eastern cottonwood thrives in locations that receive at least 6-8 hours of direct sunlight each day, which is essential for its rapid growth and robust health. Watering Needs : Populus deltoides prefers moist conditions and can tolerate periodic flooding, making it suitable for areas with high water tables or near water bodies. Ensure the soil remains consistently moist, especially during dry spells, to support its rapid growth. Soil Type and pH Preferences : Thrives in well-drained, fertile soils, and prefers slightly acidic to neutral pH levels. It is adaptable to various soil types but performs best in deep, loamy soils. It is also tolerant of heavy, clayey soils. Temperature and Climate Requirements : Hardy in USDA Zones 3-9, Populus deltoides is adaptable to a wide range of climates. It can withstand cold winters and hot, humid summers, making it a versatile tree for many regions. Pruning and Maintenance : Requires minimal maintenance once established. Pruning should be done in late winter or early spring to remove dead or weak branches and to shape the tree if necessary. Due to its rapid growth, regular inspection and pruning may be needed to manage its size and structure. Propagation : Can be propagated by cuttings or by seed. Hardwood cuttings taken in late winter or early spring are often preferred for garden planting, as they ensure faster establishment and uniformity of plants. Seeds can be sown directly in moist soil but may require stratification to germinate. Populus deltoides adds impressive height and a stately presence to landscapes, making it a popular choice for large open areas, windbreaks, or riparian zones. Its tolerance for wet conditions and rapid growth rate make it an excellent choice for reclamation projects and naturalized landscapes, while its distinctive leaves and seeds provide visual interest throughout the growing season. Planting and Propagation Populus deltoides , commonly known as Eastern Cottonwood, is a fast-growing deciduous tree valued for its rapid growth, shade provision, and adaptability to various soil conditions. Ideal for large landscapes, riverbanks, and areas requiring quick tree cover, here's a guide on how to plant and care for Eastern Cottonwood to enhance your garden spaces. When to Plant Best Time : Plant in early spring or fall. These periods provide cooler, moist conditions that help the tree establish strong roots. Zone Considerations : Hardy in USDA zones 2-9, Eastern Cottonwood can grow in a variety of climates, with a preference for moist environments. Selecting a Site12 Sunlight : Prefers full sun. While it can tolerate partial shade, full sun promotes the best growth and development. Soil : Thrives in moist, well-drained soils and is especially suitable for areas near water bodies. It's adaptable to a range of soil types, including clay, loamy, and sandy soils, as long as moisture is maintained. Planting Steps Soil Preparation : Enhance soil with organic matter to improve moisture retention, particularly in areas with poor drainage, although extensive amendment is generally unnecessary due to the tree's natural adaptability. Spacing : Space trees 40 to 50 feet apart. This spacing allows for the tree's large canopy spread and ensures adequate air circulation. Planting Depth : Dig a hole as deep as the root ball and twice as wide. Place the tree in the hole, ensuring the top of the root ball is level with the surrounding soil. Fill in with soil and press firmly. Ongoing Care Watering : Keep the soil consistently moist, particularly during the first growing season to establish a robust root system. Eastern Cottonwood is tolerant of wet conditions once established. Fertilizing : Fertilization is typically unnecessary. Populus deltoides is adapted to thrive in nutrient-poor, moist conditions. Pruning : Minimal pruning is required. Prune in late winter or early spring to maintain shape and encourage healthy new growth. Remove any dead or damaged branches as needed. Propagation Cuttings : Propagate by hardwood cuttings in late winter to early spring. Take 8-12 inch cuttings from the previous year's growth, remove the lower leaves, and place the cuttings in a moist rooting medium. Seed : Seed propagation is possible but less common due to the ease of propagating by cuttings. If desired, collect seeds in late spring for sowing. Planting Eastern Cottonwood enriches your landscape with a visually striking and environmentally beneficial tree that thrives in moist areas. Its rapid growth and adaptability to challenging conditions make it a valuable addition to any large-scale planting design, offering both aesthetic appeal and support for local biodiversity. Pests and Disease Eastern Cottonwood is generally hardy and resistant to pests and diseases. Rarely troubled by pests or diseases, making it a low-maintenance choice for large landscapes and riparian areas. Good air circulation and proper spacing help maintain plant health. Feeding and Fertilizing Initial Feeding : Apply a balanced, slow-release fertilizer in early spring as new growth begins. Formulas specifically designed for trees, such as a 10-10-10 NPK ratio, are ideal to support healthy foliage and root development. Soil Preparation : Before planting, ensure the soil is well-drained and rich in organic matter. Incorporate compost to improve soil fertility and structure, which is beneficial for Populus deltoides growth. Supplemental Feeding : Consider a mid-season application of a liquid fertilizer if growth appears stunted or if the tree shows signs of nutrient deficiency. Avoid excessive nitrogen as it can lead to weak, leggy growth susceptible to breakage. pH Preference : Populus deltoides thrives in slightly acidic to neutral soil conditions, with a preferred pH range of 5.5 to 7.5. Testing and adjusting soil pH can optimize nutrient uptake and overall tree health. Avoid High Nitrogen Fertilizers : High nitrogen levels may promote excessive vegetative growth over strong wood formation in Populus deltoides. Use fertilizers with balanced NPK ratios to support overall health and stability. Drought Tolerance : Once established, Populus deltoides exhibits moderate drought tolerance. Ensure consistent watering during the establishment phase and avoid prolonged periods of drought to prevent stress and potential damage. Populus deltoides, commonly known as the Eastern Cottonwood, is valued for its fast growth and large size, providing ample shade and habitat for wildlife. Its ability to thrive in various soil conditions makes it a versatile choice for large landscapes, riparian zones, and windbreaks. Varieties and Cultivars While Populus deltoides is a distinct species, there are several recognized cultivars and varieties commonly available for garden and landscape diversity. Some of these include 'Siouxland', 'Noreaster', and 'Cottonless'. Select plants based on your local climate, as Eastern Cottonwood thrives in moist, well-drained soils and adapts well to various environmental conditions. Seasonal Care for Populus deltoides Spring Cleanup: Remove any dead or damaged branches that may have accumulated over the winter. This promotes healthy new growth and keeps the tree looking neat. Planting: Spring is an ideal time to plant Populus deltoides saplings. Choose a site with full sun and well-drained soil conditions. Watering: Ensure newly planted saplings receive regular watering to establish their roots. Established trees are quite tolerant of various soil conditions but still appreciate consistent moisture. Mulching: Apply a layer of organic mulch around the trees to help retain soil moisture and reduce weed growth. Avoid piling mulch directly against the tree trunks. Summer Watering: Established Populus deltoides trees usually do not require extra watering unless there is a prolonged dry spell. Keep the soil consistently moist. Maintenance: This tree is relatively low maintenance, but check for any pest or disease issues, which can be common. Prune any dead or damaged branches to keep the tree healthy and attractive. Fall Enjoy the Display: The broad, triangular leaves turn a brilliant yellow in the fall, providing visual interest. The trees also produce distinctive catkins and seeds. Preparation for Winter: Populus deltoides can be left intact to provide winter interest and habitat for wildlife. The fallen leaves can offer additional insulation for the roots during cold weather. Winter Protection: The tree is generally hardy, but leaving the fallen leaves around the base can offer additional insulation for the roots during cold weather. Cut Back: In late winter or early spring, prune back any dead or damaged branches to make way for new growth. Year-Round Tips Soil and Fertilization: Populus deltoides thrives in well-drained soils and does not typically need additional fertilization if planted in a suitable location. However, it benefits from fertile soil conditions. Propagation: To propagate new trees, take hardwood cuttings in late winter or early spring. Ensure the cuttings remain moist until roots develop. Planting Companions: Pair Populus deltoides with other moisture-loving plants like Salix (willows), Acer saccharinum (silver maple), and Cornus sericea (red osier dogwood) to create a vibrant, water-wise garden. By following these seasonal care tips, your Populus deltoides will thrive, providing beauty and biodiversity to your garden while enhancing moist or damp areas with its unique texture and form. Plant Uses Populus deltoides is versatile in both its use and placement in the garden. Excellent for riparian buffers, floodplain restoration, and erosion control. The tall, stately presence adds ornamental value and provides shade. Attracts birds and other wildlife, making it a valuable addition to naturalized landscapes. Growing Tips and Tricks Enhance your gardening experience with these additional tips for growing Populus deltoides: Prefers a sunny location with well-drained soil for optimal growth. Thrives in riparian areas, making it suitable for planting near rivers or streams. Regular pruning can help manage its size and encourage a healthy structure. I'm a paragraph. Click here to add your own text and edit me. It's easy. Read our blogs for more gardening tips!